
Printing Advice & Slicer Settings
If you do not yet have a printer and are interested in some advice on what to choose, then our Discord support server is a good resource as the guys on there have experience of using most of the options you might be thinking about. I share my own experience and thoughts here too.
This page explains important on filament choices, slicing settings and the all important custom calibration if you want your AuthentiKit parts to fit together. The recommended slicer is Cura 4.6 or above as this contains some important features such as horizontal hole expansion. There are some specific slicer settings at the end of this page, but start with the high quality 0.12 layer height option before applying these.
Brims, Skirts & Support
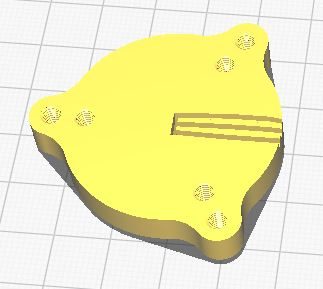
AuthentiKit parts are designed to require no post printing work. No sanding, reaming out of holes or snipping off brims. This requires very specific slicer settings to ensure that holes are the right size and first layers don’t expand too much. Parts are also designed to require no support. With few exceptions the parts require no brim and no skirt as many parts have some fine channels and openings in the base and you’ll never clean up the brim without damaging these. You’ll also find screw holes get bunged up. Below is an example as this item needs to be printed the other way up with these channels on the bed.
The requirement for no supports and also the need for strength in the appropriate dimension means that every part has to be printed at a particular orientation. Each AuthentiKit download includes a list of parts and the recommended orientation.
Filament Choices
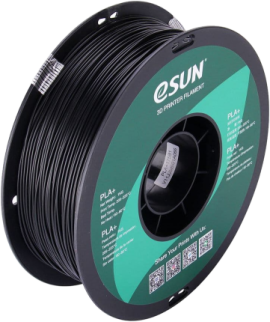
I experimented with a lot of filament. There are some nice matte finish options around but I wasn’t too convinced about their strength. In the end I went with eSun PLA+ in the following colours.
- Black for most parts
- Olive green for panels that are meant to match an aircraft body
- Silver for metal finish parts e.g. fire button
eSun PLA+ is easy to find on Amazon though I had to go to 3dfilaprint.com for the olive green. You may well want to print in PETG which is known to be stronger. I found PLA+, printed at 215 degrees, to be perfectly strong although some of the beta testers used PETG. If you do go with PETG I’d recommend fine tuning your printer settings first as is tends to come out quite a bit rougher and needs more post print cleaning. My personal view on the choice of filament is that PLA+ is fine for strength.
CAUTION All PLA will go soft at around 50 centigrade which happens surprisingly easily if left by a window on a sunny day for a couple of hours.
Bed Levelling
You will need to level the bed well to ensure good adhesion, but don’t overdo it as you’ll end up with too much first layer squishing (horizontal expansion) which stops some parts fitting together.
Incidentally, my personal approach to first layer adhesion is to use a glass bed with microporous coating. I didn’t find the Creality beds to be that flat so I went with one from Wisamic. I wash it with detergent poured on neat and rubbed in well before washing off. Then I never touch it with my fingers.
For levelling a printer without auto bed levelling I suggest using the gcode that moves the head for you as otherwise I found I was messing things up moving the print head to different places with my hands.
AuthentiKit Loose Fit Calibration (LFC)
BEWARE Normal accurate printer calibration will give you problems assembling certain parts.
AuthentiKit controls are deliberately designed assuming a loose fit calibration as it allows less experienced designers to more easily create parts that fit inside each other without designing in tolerances. If you don't have this and try to fit a 5mm dowel inside a 5mm hole the parts will be so tight they won't fit. See this video for a full explanation and download links to the calibration widgets.
Print Orientation
Many parts require 90 degree or 180 degree rotation in order to lie flat on the bed on the required side. This pitch lever for example needs to be rotated 90 degrees in the green axis to lie it flat on the side it was designed to be printed on. This is a relatively easy example, but there are one or two parts which can’t be reliably laid flat by simply rotating by 90 or 180 degrees.
For this reason it is often safer to use the "click to lay flat" feature of Cura and click on the face that you would like to be flat to the print bed.
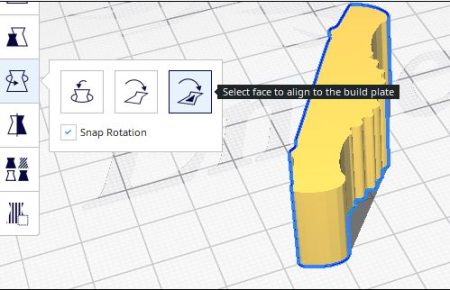
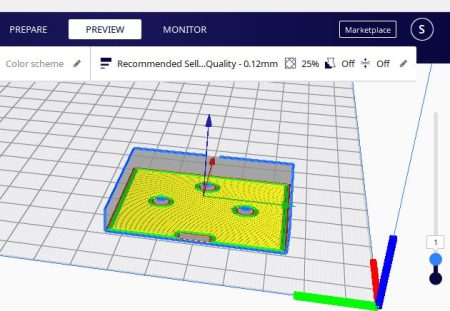
Finally, if you have any doubt that the part is flat to the print bed, it is good practice to slice the part then use preview and drag the right slider down to show just layer 1. You will then see definitively whether the first layer is what you expect it to be or whether it is still at an angle and not making contact with the bed quite the way you expect.
Selective Strengthening
Most parts are printed at around 25% infill, with occasional parts printed a fair bit higher. In some cases you might want to print most of the part at one infill and selectively strengthen areas with greater infill.
One example is the Spitfire brake lever. You can print this at 33% overall, but then print the shaft at 75% plus as it is a part that could be vulnerable to snapping. Do this using the support blocking tool.
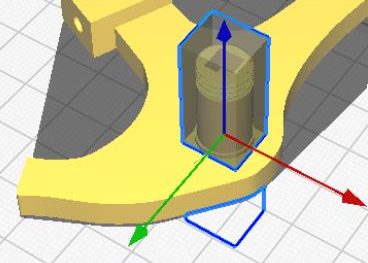
- Load the lever in
- Select it
- Click the support block tool then click onto the lever near the shaft
- Now select the cube that has been placed and use the scaling tool to (unlock “uniform scaling”) to make a tall column
- Now drag the the column so it surrounds the shaft as above
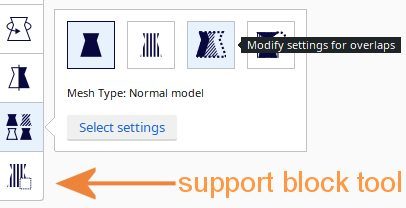
- Select the mesh type tool (shown here) and pick the option “modify settings for overlaps”
- Click “Select settings” and choose infill density Now you can say that the infill for the area of the lever inside the cube is 75%
- Preview the sliced model to see for yourself that the infill is greater where you want it
In this video I take you through the above steps with a different scenario of where selective strengthening is important, which is the jaws part of a number of the extension arms used by the rig extension A.
Key Slicer Settings
Setting | Value | Explanation |
|---|---|---|
Layer Height | 0.12mm (0.24 for 1st layer) | High precision needed to facilitate areas like printed screw threads |
Line Width | 0.4mm |
|
Outer Before Inner Walls | On | I find I get better dimensional accuracy where I need it |
Print Thin Walls | On |
|
Fill Gaps Between Walls | Everywhere | There are a lot of slim side walls around 2mmm thick and this setting protects against delamination |
Horizontal Expansion | -0.04mm (-0.08 for 1st layer) | Start with this, then print the calibration STL and experiment to match your filament properties. This ensures parts fit together and might save you many wasted hours ! |
Horizontal Hole Expansion | 0.075mm | A little extra needed for holes |
Infill Density | Varied | See list for recommended infill density |
Slicing Orientation | Varied | See list for recommended print orientation |
|
| |
Print Temperature | 215c Plus | Keep it as high as possible subject to stringing to maximise layer adhesion. |
Support | None | Support can make parts difficult to fit together |
Build Plate Adhesion | None | All parts designed to print without. Brims can make parts difficult to fit together. Avoid it with a well levelled bed. |
Print Speeds | Cura Default | Defaults are generally fine subject to the adjustments below. |
Small Hole Max Size | 8mm | Use this feature to significantly slow down the printing of small holes and features, particularly on the 1st layer as there is no brim to aid adhesion. |
Small Feature Speed | 50% (also for 1st layer) | Goes with the above |